There’s something undeniably nostalgic about banana pudding. It’s the kind of dessert that transports you straight to your grandmother’s kitchen, where the smell of vanilla wafers and ripe bananas filled the air. Now, imagine taking that comforting classic and giving it a modern twist by combining it with the creamy decadence of cheesecake. The result? A Banana Pudding Cheesecake that’s a showstopper for any family gathering, holiday, or just because you’re craving something extraordinary. At Familyhouse, we’re all about bringing families together over delicious food, and this dessert is guaranteed to make everyone at the table smile.
In this blog post, we’re diving deep into everything you need to know about making the ultimate Banana Pudding Cheesecake. From a foolproof recipe to tips for getting that perfect creamy texture, we’ve got you covered. Whether you’re a seasoned baker or a beginner looking to impress, this dessert is approachable yet feels like a special occasion treat. Plus, we’ll share some personal stories and pro tips to make your baking experience as joyful as the dessert itself. Let’s get started!
Why Banana Pudding Cheesecake is the Perfect Family Dessert
Banana pudding and cheesecake are two desserts that scream comfort and indulgence, so why not combine them? This hybrid dessert takes the best parts of both worlds: the nostalgic flavors of banana pudding—sweet bananas, creamy pudding, and crunchy vanilla wafers—and the rich, velvety texture of a classic cheesecake. It’s a dessert that feels both familiar and excitingly new, making it perfect for family dinners, potlucks, or holiday celebrations.
What I love most about this recipe is how it brings people together. I remember the first time I made this for a family reunion. My cousins, who are notoriously picky eaters, couldn’t stop raving about it. Even my uncle, who claims he “doesn’t do desserts,” went back for seconds. It’s the kind of dish that sparks conversation, with everyone asking for the recipe or reminiscing about their favorite childhood desserts. That’s the magic of food—it’s not just about eating; it’s about creating memories.
Ingredients for Banana Pudding Cheesecake
Before we dive into the recipe, let’s talk about the ingredients. One of the best things about this dessert is that it uses simple, pantry-friendly ingredients you likely already have. Here’s what you’ll need:
For the Crust:
- 2 cups vanilla wafer crumbs (about 50-60 Nilla Wafers, crushed)
- 6 tablespoons unsalted butter, melted
- 1/4 cup granulated sugar
For the Cheesecake Filling:
- 3 (8-ounce) packages cream cheese, softened
- 1 cup granulated sugar
- 3 large eggs
- 1 cup sour cream
- 1/2 cup heavy cream
- 1 tablespoon vanilla extract
- 2 ripe bananas, mashed (about 1 cup)
- 1 (3.4-ounce) package instant banana pudding mix
For the Banana Pudding Topping:
- 1 (3.4-ounce) package instant vanilla pudding mix
- 1 1/2 cups cold milk
- 1 cup heavy cream, whipped to soft peaks
- 2-3 ripe bananas, sliced
- 1 cup vanilla wafer crumbs (for garnish)
- Whipped cream (optional, for extra decadence)
Notes on Ingredients:
- Bananas: Use ripe but not overly mushy bananas for the best flavor. They should be yellow with a few brown spots—perfectly sweet but still firm enough to hold their shape.
- Cream Cheese: Make sure it’s softened to room temperature to avoid lumps in your cheesecake batter.
- Vanilla Wafers: Nilla Wafers are the classic choice, but you can substitute with graham crackers if you’re in a pinch. However, the wafers really enhance that banana pudding vibe.
- Pudding Mix: Instant pudding mix is a time-saver and adds that nostalgic banana pudding flavor. If you prefer homemade, you can make a custard from scratch, but the instant mix works beautifully.
Step-by-Step Recipe for Banana Pudding Cheesecake
This recipe makes a 9-inch cheesecake, serving about 10-12 people. It’s straightforward but requires a little patience to get that perfect texture. Don’t worry—I’ll walk you through every step!
Step 1: Prepare the Crust
- Preheat your oven to 325°F (163°C).
- In a medium bowl, combine the vanilla wafer crumbs, melted butter, and granulated sugar. Stir until the mixture resembles wet sand.
- Press the mixture firmly into the bottom of a 9-inch springform pan. Use the back of a measuring cup to create an even layer.
- Bake the crust for 8-10 minutes, then let it cool while you prepare the filling.
Pro Tip: For an extra sturdy crust, wrap the bottom of the springform pan with aluminum foil to prevent any leaks during baking.
Step 2: Make the Cheesecake Filling
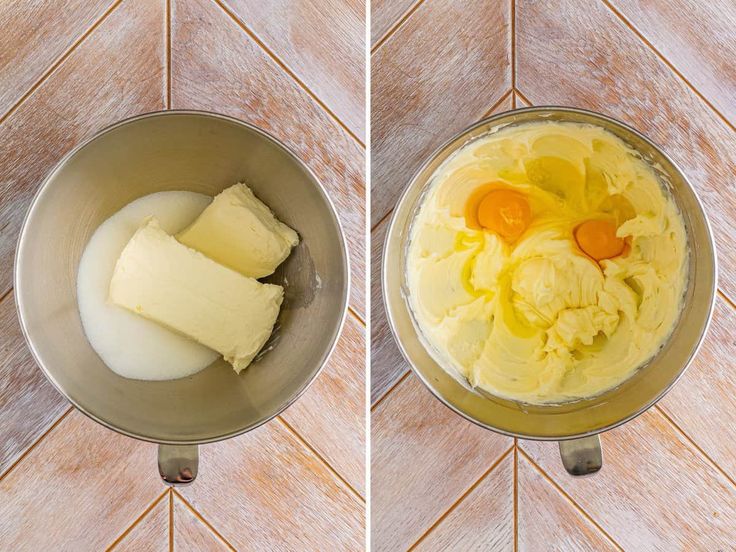
- In a large mixing bowl, beat the softened cream cheese with an electric mixer on medium speed until smooth and creamy, about 2 minutes.
- Gradually add the granulated sugar and beat until fully combined.
- Add the eggs one at a time, beating on low speed after each addition until just incorporated. Overmixing can cause cracks in your cheesecake, so go easy!
- Add the sour cream, heavy cream, vanilla extract, mashed bananas, and instant banana pudding mix. Mix on low speed until everything is smooth and well combined.
- Pour the filling over the cooled crust, smoothing the top with a spatula.
Personal Touch: The first time I made this, I was nervous about adding mashed bananas to the filling, thinking it might make the cheesecake too wet. But trust me, the bananas blend beautifully with the cream cheese, giving it a subtle sweetness and that unmistakable banana pudding flavor.
Step 3: Bake the Cheesecake
- Place the springform pan in a large roasting pan. Pour hot water into the roasting pan until it reaches about halfway up the sides of the springform pan. This water bath helps prevent cracks and ensures a creamy texture.
- Bake for 60-70 minutes, or until the edges are set but the center still has a slight jiggle.
- Turn off the oven, crack the door, and let the cheesecake cool in the oven for 1 hour. This gradual cooling also helps prevent cracks.
- Remove the cheesecake from the oven and water bath, then refrigerate for at least 4 hours, preferably overnight.
Step 4: Prepare the Banana Pudding Topping
- In a medium bowl, whisk together the instant vanilla pudding mix and cold milk until thickened, about 2 minutes.
- Gently fold in the whipped cream to create a light, fluffy topping.
- Spread the pudding mixture over the chilled cheesecake.
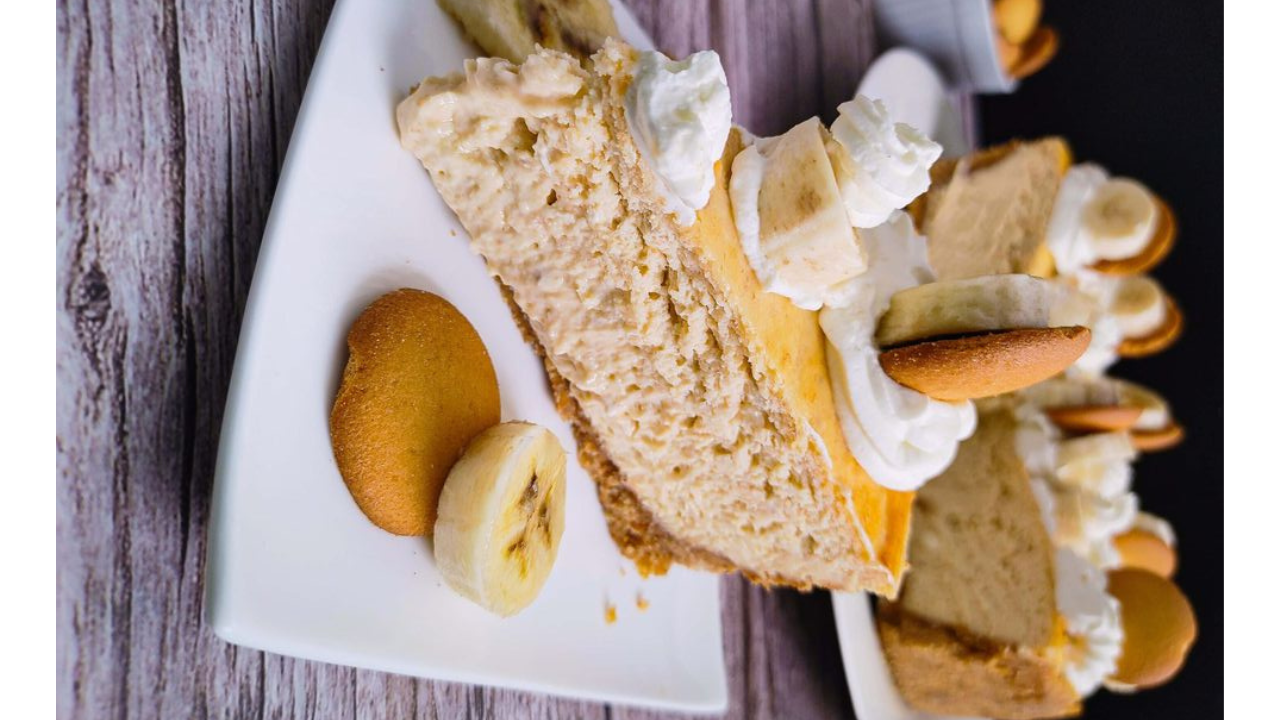
- Top with sliced bananas and a sprinkle of vanilla wafer crumbs. Add dollops of whipped cream around the edges for a picture-perfect finish.
Pro Tip: To prevent the banana slices from browning, brush them lightly with lemon juice or pineapple juice before placing them on the cheesecake.
Step 5: Serve and Enjoy!
Slice the cheesecake with a sharp knife, wiping it clean between cuts for neat slices. Serve chilled and watch your family’s faces light up with every creamy, banana-filled bite.
Tips for the Perfect Banana Pudding Cheesecake
- Avoid Cracks: The water bath and gradual cooling are key to a smooth, crack-free cheesecake. If cracks do happen, don’t worry—the pudding topping will cover them up!
- Make Ahead: This cheesecake is even better the next day, as the flavors meld together in the fridge. It’s a great dessert to prepare a day in advance for stress-free entertaining.
- Storage: Store leftovers in an airtight container in the fridge for up to 5 days. You can also freeze individual slices (without the topping) for up to 2 months. Just thaw in the fridge before serving.
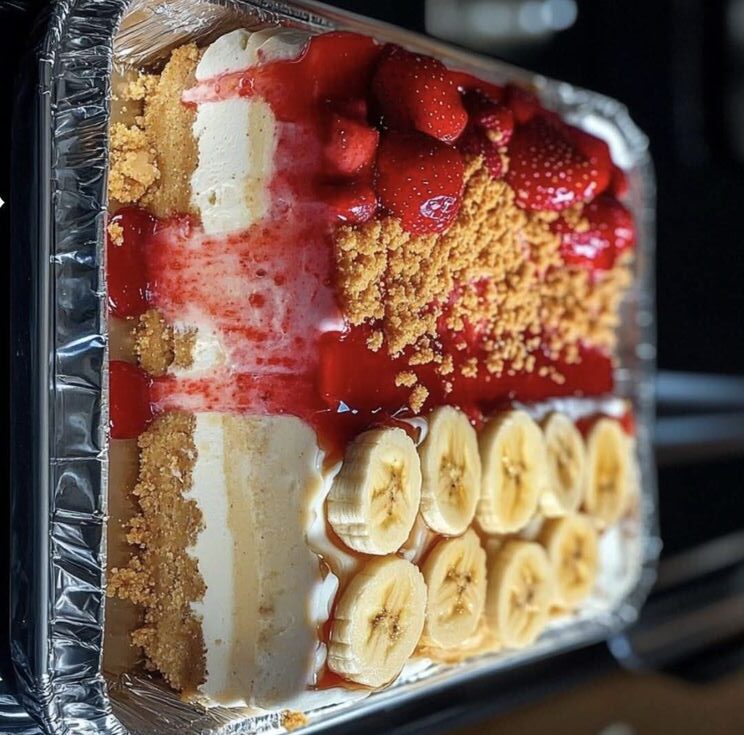
- Customization: Want to mix things up? Try adding a layer of caramel sauce between the cheesecake and pudding topping for a bananas foster twist. Or, sprinkle some crushed pecans for extra crunch.
Why This Dessert is a Familyhouse Favorite
At Familyhouse, we believe food is about more than just eating—it’s about connection. This Banana Pudding Cheesecake is the kind of dessert that brings everyone to the table, from kids who love the sweet banana flavor to adults who appreciate the sophisticated cheesecake twist. It’s versatile enough for casual weeknight dinners but special enough for holidays like Thanksgiving or Christmas.
I’ll never forget the time I brought this to a neighborhood potluck. My friend Sarah, who’s a self-proclaimed dessert snob, took one bite and declared it “the best thing she’d ever eaten.” That’s when I knew this recipe was a keeper. It’s not just about the taste—it’s about the joy of sharing something homemade with the people you love.
SEO Optimization and Serving Suggestions
To make this post as helpful as possible (and to give it a boost on Google), here are some additional ideas for serving and enjoying your Banana Pudding Cheesecake:
- Pairings: Serve with a hot cup of coffee or a glass of iced sweet tea for that true Southern vibe. For an adult twist, a splash of bourbon in the whipped cream topping adds a fun kick.
- Presentation: For a stunning presentation, pipe the whipped cream into swirls using a piping bag and star tip. Garnish with extra vanilla wafers or a drizzle of chocolate sauce.
- Occasions: This dessert is perfect for birthdays, baby showers, or summer barbecues. It’s also a great make-ahead option for busy holiday seasons.
By using keywords like “Banana Pudding Cheesecake,” “Southern dessert,” “easy cheesecake recipe,” and “family dessert ideas” naturally throughout the post, we’re ensuring it’s optimized for search engines while still feeling authentic and engaging.
Final Thoughts
There’s something truly special about a dessert that combines nostalgia with indulgence. This Banana Pudding Cheesecake is more than just a recipe—it’s a way to create new memories with your family while honoring the flavors of the past. Whether you’re baking it for a special occasion or just because, it’s sure to become a favorite in your household, just like it is in ours at Familyhouse.
So, grab your mixing bowls, put on some music, and let’s make this delicious dessert together. We’d love to hear how it turns out for you! Share your photos and stories with us on social media using #FamilyhouseRecipes, and let’s keep the love of homemade food alive.
Happy baking!