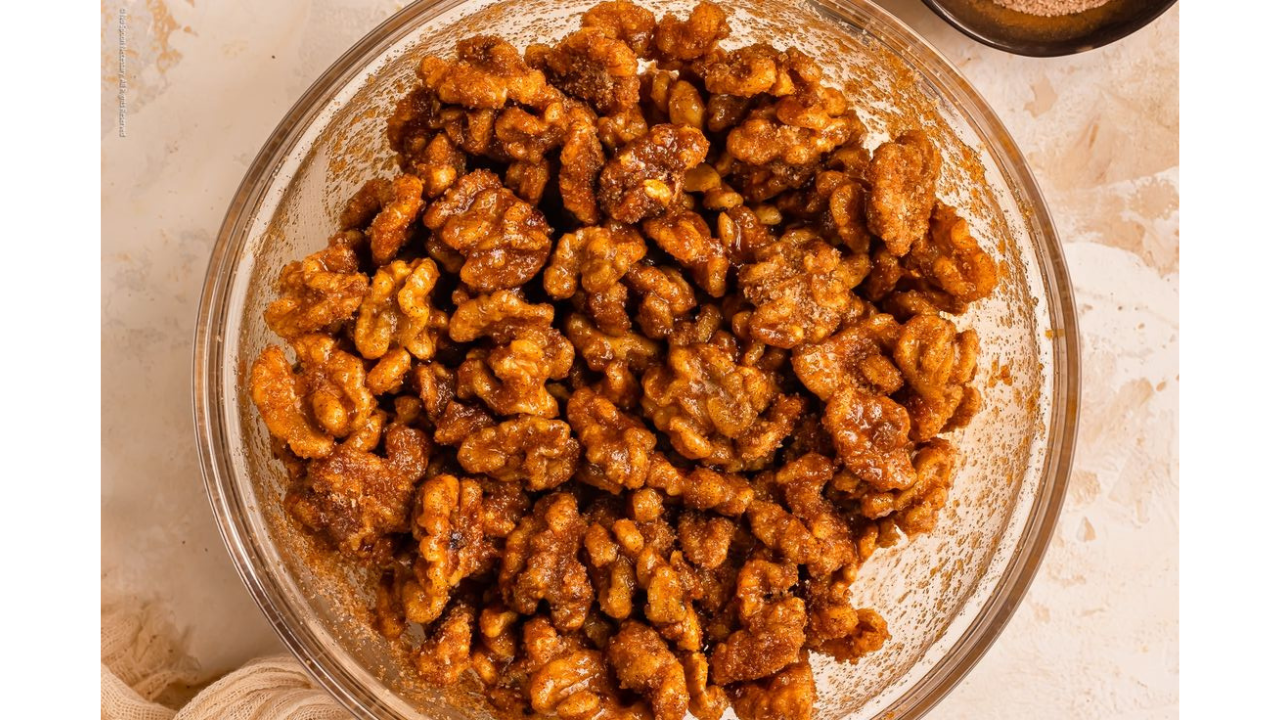
There’s something undeniably magical about candied walnuts. That perfect balance of sweet, caramelized crunch paired with the rich, earthy flavor of walnuts—it’s a combination that feels like a warm hug on a chilly fall day. Whether you’re tossing them into a salad, sprinkling them over a dessert, or just munching on them straight from the bowl (no judgment here!), candied walnuts are a versatile treat that elevates any dish. At Familyhouse, we’re all about sharing recipes and tips that bring people together, and this candied walnut recipe is one you’ll want to keep in your back pocket for every occasion.
In this post, I’m going to walk you through everything you need to know about making candied walnuts at home. From choosing the best walnuts to mastering that glossy, sugary coating, I’ve got you covered with a foolproof recipe, tips, tricks, and even some creative ways to use these addictive morsels. Plus, I’ll share a bit of my own story about why candied walnuts hold a special place in my heart. Let’s dive in!
Why Candied Walnuts Are a Must-Try
Candied walnuts are one of those treats that seem fancy but are surprisingly easy to make. They’re the kind of thing you’d expect to find at a gourmet market or a high-end restaurant, but with just a handful of ingredients and about 15 minutes, you can whip up a batch in your own kitchen. Not only are they delicious, but they’re also packed with nutrients—walnuts are a great source of healthy fats, protein, and antioxidants. When you candy them, you’re adding a touch of sweetness that makes them feel indulgent without being overly heavy.
I first fell in love with candied walnuts at a family gathering years ago. My aunt brought a big bowl of them to a holiday dinner, and I couldn’t stop sneaking handfuls before the meal even started. There was something about the way the sugar crunched between my teeth and the warm, toasty flavor of the walnuts that made them utterly addictive. Since then, I’ve been on a mission to perfect my own recipe, and I’m excited to share it with you today.
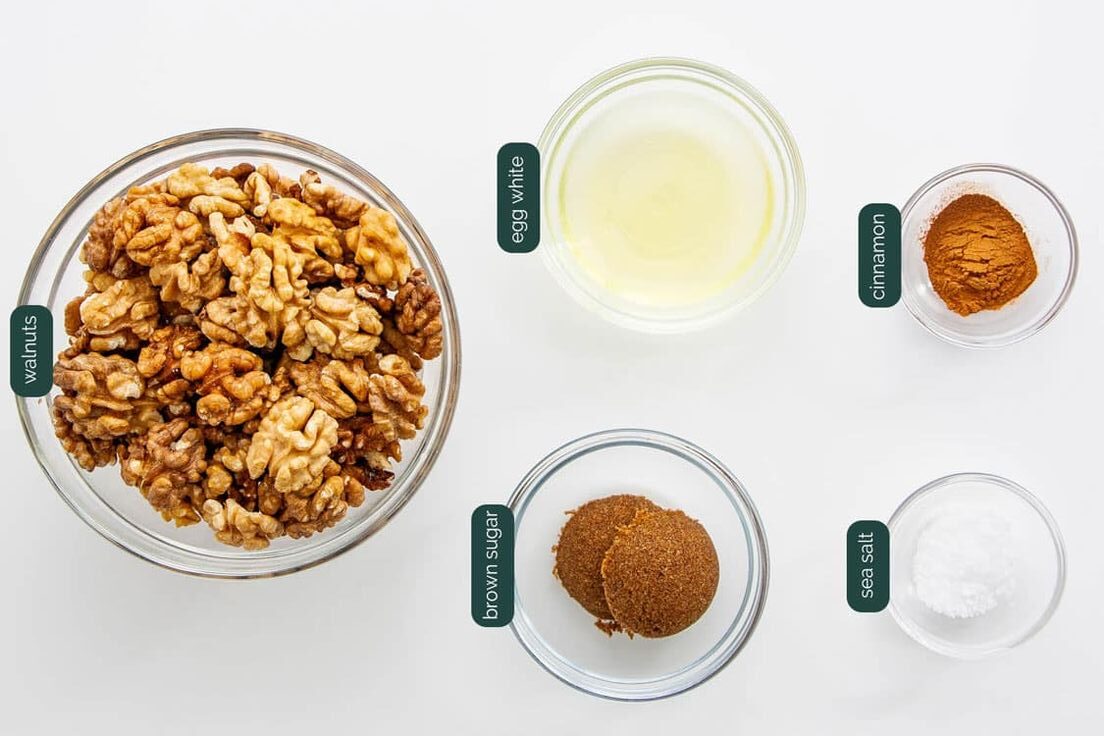
Ingredients for Perfect Candied Walnuts
Before we get to the recipe, let’s talk about the ingredients. The beauty of candied walnuts is their simplicity—you don’t need a long list of fancy items to make them shine. Here’s what you’ll need:
- 1 cup walnut halves (raw, unsalted—choose high-quality walnuts for the best flavor)
- 1/4 cup granulated sugar (white sugar works best for a clean, crisp coating)
- 1 tablespoon unsalted butter (adds richness and helps the sugar stick)
- 1/4 teaspoon ground cinnamon (optional, but it adds a warm, cozy note)
- Pinch of salt (enhances the sweetness and brings out the nutty flavor)
- 1/2 teaspoon vanilla extract (optional, for a subtle depth of flavor)
A Quick Note on Walnuts
Not all walnuts are created equal. For the best results, look for fresh, raw walnut halves that are plump and free of any rancid smell. If you can, buy them from a store with high turnover or a local farmer’s market to ensure freshness. I learned this the hard way after using a bag of walnuts that had been sitting in my pantry for months—let’s just say the flavor was less than stellar. Fresh walnuts make all the difference!
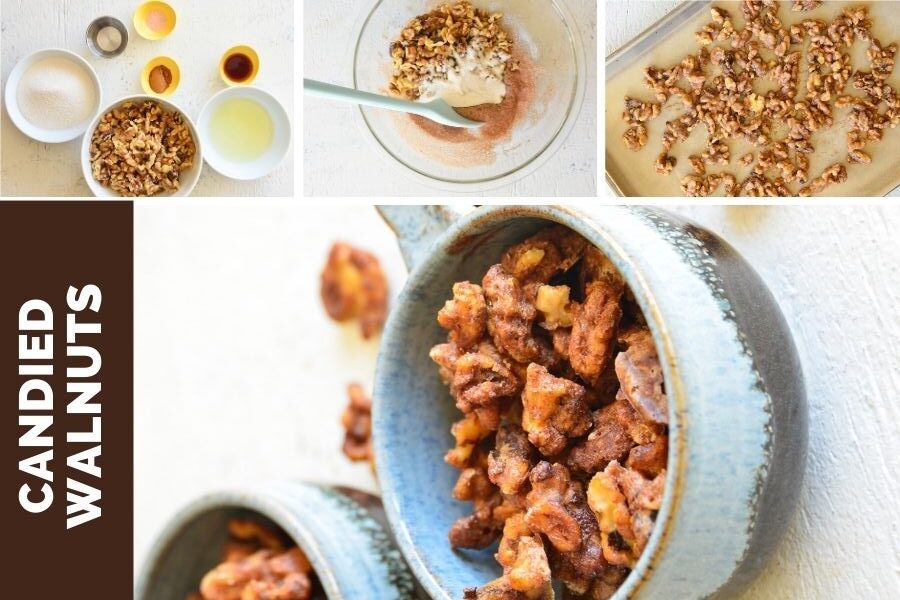
Step-by-Step Recipe: How to Make Candied Walnuts
This recipe is designed to be quick and easy, so you can have a batch of candied walnuts ready in no time. It makes about one cup, but trust me, you’ll want to double it because these disappear fast!
Ingredients
- 1 cup walnut halves
- 1/4 cup granulated sugar
- 1 tablespoon unsalted butter
- 1/4 teaspoon ground cinnamon (optional)
- Pinch of salt
- 1/2 teaspoon vanilla extract (optional)
Instructions
- Prep Your Pan: Line a baking sheet with parchment paper or a silicone baking mat. This will make cleanup a breeze and prevent the walnuts from sticking.
- Toast the Walnuts (Optional): For extra flavor, lightly toast the walnuts in a dry skillet over medium heat for 2-3 minutes, stirring occasionally. You’ll know they’re ready when they start to smell nutty. Be careful not to burn them! Set them aside.
- Melt the Butter and Sugar: In a medium skillet over medium heat, melt the butter. Once melted, add the sugar and stir constantly with a wooden spoon or silicone spatula. The sugar will start to melt and form a thick, syrupy mixture. This takes about 2-3 minutes.
- Add the Walnuts: Add the walnut halves to the skillet and stir to coat them evenly in the sugar mixture. Keep stirring for another 2-3 minutes until the sugar caramelizes and turns a golden brown. If you’re using cinnamon and salt, sprinkle them in now.
- Add Vanilla (Optional): Remove the skillet from the heat and stir in the vanilla extract, if using. The mixture will sizzle a bit—this is normal!
- Spread and Cool: Quickly transfer the walnuts to the prepared baking sheet, spreading them out in a single layer. Use a fork to separate any walnuts that are sticking together. Let them cool completely, about 10 minutes. The sugar will harden as it cools, giving you that signature candied crunch.
- Store and Enjoy: Once cooled, store the candied walnuts in an airtight container at room temperature for up to two weeks—if they last that long!
Pro Tips for Success
- Keep Stirring: The sugar can burn quickly, so keep the walnuts moving in the pan to ensure even coating and prevent scorching.
- Work Fast: Once the sugar starts to caramelize, things move quickly. Have your baking sheet ready to go so you can spread the walnuts out before the sugar hardens.
- Experiment with Flavors: Try adding a pinch of cayenne pepper for a sweet-spicy kick or swap the cinnamon for pumpkin pie spice for a fall-inspired twist.
Creative Ways to Use Candied Walnuts
Candied walnuts are incredibly versatile, and I love finding new ways to incorporate them into meals and snacks. Here are some of my favorite ideas:
- Salad Topper: Toss them into a salad with mixed greens, goat cheese, dried cranberries, and a balsamic vinaigrette. The crunch and sweetness add the perfect contrast to the tangy dressing.
- Dessert Garnish: Sprinkle them over ice cream, yogurt, or a warm slice of apple pie. They add a delightful texture and a touch of elegance.
- Cheese Board Star: Add candied walnuts to a charcuterie board alongside cheeses, fruits, and crackers. They pair beautifully with brie or blue cheese.
- Holiday Gifts: Package them in cute jars or cellophane bags tied with a ribbon for a thoughtful homemade gift. I did this one Christmas, and my friends couldn’t stop raving about them!
- Snack Attack: Honestly, they’re perfect on their own. Keep a small bowl on your counter for a quick, satisfying snack.
One of my favorite memories is bringing a batch of candied walnuts to a potluck with friends. I tossed them into a spinach salad, and everyone was asking for the recipe before the night was over. It’s moments like those that remind me why I love cooking—sharing food is such a simple way to connect with the people you care about.
Troubleshooting Common Issues
Even though candied walnuts are easy to make, things can go wrong if you’re not paying attention. Here are some common issues and how to fix them:
- Sugar Seizes Up: If the sugar crystallizes instead of melting smoothly, don’t panic. Add a teaspoon of water to the pan and keep stirring over low heat until it melts again.
- Walnuts Stick Together: If your walnuts clump together, you may not have spread them out quickly enough. Use a fork to separate them while they’re still warm.
- Burnt Sugar: If the sugar starts to smell burnt or turns dark brown, you’ve gone too far. Start over with fresh sugar and lower the heat slightly.
Health Benefits of Walnuts (Yes, Even Candied Ones!)
While candied walnuts do have added sugar, they’re still a relatively healthy treat when enjoyed in moderation. Walnuts are a nutritional powerhouse, packed with omega-3 fatty acids, fiber, and antioxidants. They’ve been linked to improved heart health, better brain function, and even reduced inflammation. The key is portion control—stick to a small handful to satisfy your sweet tooth without overdoing it.
I like to think of candied walnuts as a way to sneak some healthy fats into my diet while still feeling like I’m indulging. It’s all about balance, right?
Storing and Gifting Candied Walnuts
Candied walnuts are best stored in an airtight container at room temperature. They’ll stay fresh and crunchy for about two weeks, though I’ve never had a batch last that long in my house! If you’re making them ahead for a party or as a gift, avoid storing them in the fridge, as the humidity can make them sticky.
For gifting, I love packaging them in small mason jars with a handwritten label. It’s such a personal touch, and it makes the recipient feel special. Last year, I gave out jars of candied walnuts to my coworkers, and they were a huge hit—several people asked for seconds!
A Personal Touch: Why Candied Walnuts Mean So Much to Me
I’ve mentioned my aunt’s candied walnuts already, but there’s a little more to the story. Growing up, our family dinners were always a big deal—everyone would bring a dish, and the table would be overflowing with food. My aunt’s candied walnuts were her signature contribution, and they became a symbol of those gatherings. Even now, whenever I make a batch, I’m transported back to those noisy, laughter-filled evenings with my family.
There’s something about food that carries memories, isn’t there? For me, candied walnuts aren’t just a snack—they’re a reminder of love, connection, and the joy of sharing a meal with the people you care about. I hope this recipe brings a little bit of that magic to your kitchen.
Final Thoughts
Candied walnuts are one of those recipes that feel like a secret weapon in the kitchen. They’re simple to make, endlessly versatile, and guaranteed to impress anyone who tries them. Whether you’re adding them to a holiday spread, gifting them to a friend, or just treating yourself to a sweet, crunchy snack, they’re sure to become a favorite in your home, just like they are in mine.
I’d love to hear how you use your candied walnuts! Do you toss them in salads, sprinkle them on desserts, or eat them by the handful? Drop a comment on our Familyhouse blog or share your creations with us on social media. And if you try this recipe, let me know how it turns out—I’m always excited to hear from fellow food lovers!
Happy cooking, and here’s to many more delicious moments with your loved ones.