Baking scones is like crafting a warm hug in pastry form—simple ingredients, a touch of care, and a sprinkle of love yield golden, flaky perfection. Whether you’re a novice baker or a seasoned pro, this guide will walk you through every step to create scones that melt in your mouth. From classic recipes to creative twists, we’ve got you covered with tips, tricks, and a dash of humor to make your baking adventure unforgettable.
What Are Scones, Anyway?
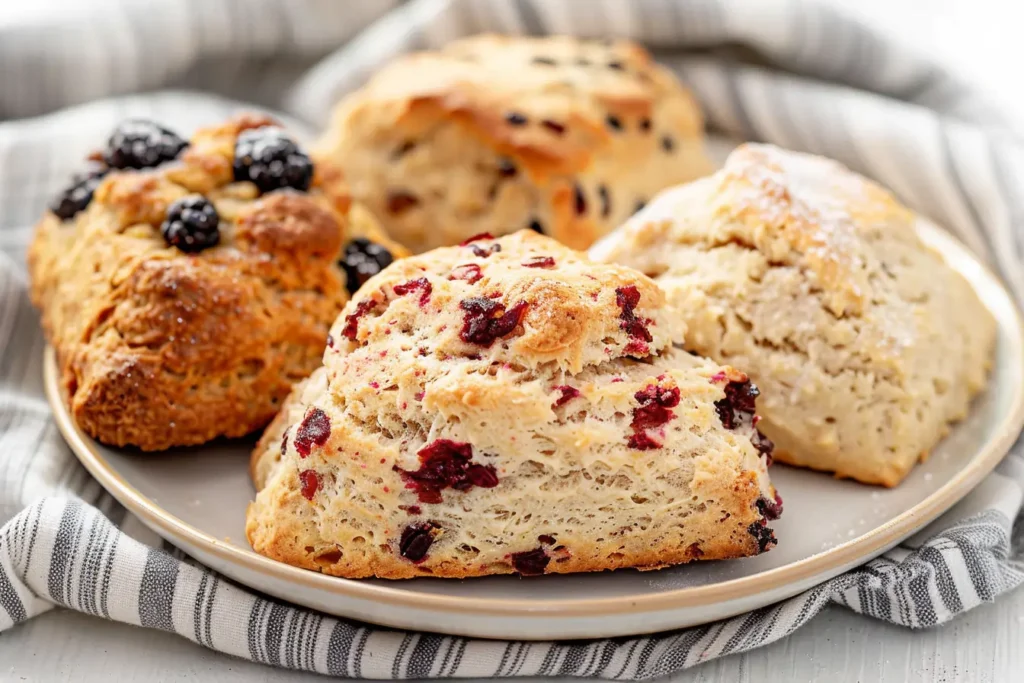
Scones are delightful baked goods that straddle the line between biscuit and cake, offering a tender crumb and a slightly crisp exterior. Originating from Scotland, they’re a staple for tea time or breakfast, often enjoyed with clotted cream and jam. Think of them as the cozy cousin of a croissant—less fussy but equally comforting.
A Brief History of Scones
Scones trace their roots to 16th-century Scotland, where they were originally cooked on a griddle and made with oats. Over time, they evolved into the oven-baked treats we know today, thanks to the introduction of baking powder. This history adds a layer of charm to every bite, connecting you to centuries of bakers.
Why Scones Are Loved Worldwide
Scones have won hearts globally due to their versatility and ease of preparation. From British tea rooms to American coffee shops, they pair perfectly with a cuppa or a latte. Their ability to adapt to sweet or savory flavors makes them a crowd-pleaser for any occasion.
The Science Behind a Perfect Scone
Great scones are a balance of art and science—too much mixing, and they’re tough; too little, and they crumble. The key lies in cold ingredients, minimal handling, and precise measurements. Let’s break down the essentials to ensure your scones rise to the occasion (pun intended).
Why Cold Ingredients Matter
Cold butter and chilled liquids create those coveted flaky layers in scones. When cold butter hits a hot oven, it releases steam, puffing up the dough. Keep your butter, milk, and even flour in the fridge until you’re ready to bake for the best results.
The Role of Baking Powder
Baking powder is the unsung hero of scone fluffiness, providing the lift that makes them light and airy. Use fresh baking powder (check the expiration date!) and measure carefully—too much can leave a metallic taste, while too little results in dense scones.
Flour: Choosing the Right Type
All-purpose flour is the go-to for most scone recipes, offering a balance of protein for structure and tenderness. For extra delicate scones, try pastry flour with a lower protein content. Avoid overworking the dough to keep the gluten in check.
Classic Scone Recipe: Step-by-Step
Ready to bake? This classic scone recipe yields eight golden, buttery scones perfect for any occasion. Follow these steps, and you’ll be savoring warm scones with your favorite toppings in no time. Let’s get started!
Ingredients for Classic Scones
Here’s what you’ll need for perfect scones:
- 2 cups (240g) all-purpose flour
- 1/3 cup (65g) granulated sugar
- 1 tablespoon baking powder
- 1/2 teaspoon salt
- 1/2 cup (115g) unsalted butter, cold and cubed
- 1/2 cup (120ml) heavy cream, cold
- 1 large egg, cold
- 1 teaspoon vanilla extract
- Optional: 1 cup mix-ins (e.g., dried fruit, chocolate chips)
This recipe is forgiving, so feel free to tweak it with your favorite flavors.
Step-by-Step Instructions
- Preheat and Prep: Preheat your oven to 400°F (200°C) and line a baking sheet with parchment paper.
- Mix Dry Ingredients: In a large bowl, whisk flour, sugar, baking powder, and salt.
- Cut in Butter: Add cold butter cubes and use a pastry cutter or your fingers to work it into the flour until the mixture resembles coarse crumbs.
- Combine Wet Ingredients: In a small bowl, whisk heavy cream, egg, and vanilla. Pour into the dry mixture and stir until just combined.
- Add Mix-Ins: Gently fold in any mix-ins, like blueberries or currants.
- Shape and Cut: Turn dough onto a floured surface, pat into an 8-inch round, and cut into 8 wedges.
- Bake: Place wedges on the baking sheet and bake for 18–22 minutes until golden.
- Cool and Serve: Let cool slightly before serving with jam, cream, or butter.
These steps are simple but precise, ensuring scones that are both tender and flaky.
Tools You’ll Need
To make scones like a pro, gather these essentials:
- Pastry cutter: For cutting butter into flour.
- Mixing bowls: At least one large and one small.
- Baking sheet: A sturdy one for even baking.
- Parchment paper: Prevents sticking and makes cleanup easy.
These tools are widely available at kitchen stores or online retailers like Amazon.
Variations to Spice Up Your Scones
Once you’ve mastered the classic recipe, it’s time to get creative. Scones are a blank canvas for flavors, from sweet to savory. Here are some crowd-pleasing variations to try.
Sweet Scone Variations
Sweet scones are perfect for breakfast or dessert. Try these ideas:
- Blueberry Lemon: Add 1 cup fresh blueberries and 1 tablespoon lemon zest.
- Chocolate Chip: Mix in 1 cup semi-sweet chocolate chips for a kid-friendly treat.
- Cranberry Orange: Combine 1 cup dried cranberries with 2 teaspoons orange zest.
These variations add a burst of flavor while keeping the scone’s signature texture.
Savory Scone Variations
Savory scones are ideal for brunch or as a side for soups. Consider these:
- Cheddar Chive: Fold in 1 cup shredded cheddar and 2 tablespoons chopped chives.
- Bacon and Scallion: Add 1/2 cup cooked, crumbled bacon and 1/4 cup chopped scallions.
- Herb and Parmesan: Mix in 1/2 cup grated Parmesan and 1 tablespoon mixed herbs (e.g., rosemary, thyme).
Savory scones are a delightful change of pace and pair beautifully with a hearty meal.
Gluten-Free and Vegan Options
Everyone deserves a scone! For dietary needs, try these swaps:
- Gluten-Free: Use a 1:1 gluten-free flour blend, like Bob’s Red Mill.
- Vegan: Replace butter with cold coconut oil and use plant-based milk with a splash of vinegar instead of cream and egg.
These adaptations ensure everyone can enjoy a scone without sacrificing flavor.
Comparison: Scones vs. Biscuits
Scones and biscuits are often confused, but they’re distinct in texture and flavor. Here’s a quick comparison to clarify the differences.
| Feature | Scones | Biscuits |
|---|---|---|
| Texture | Crumbly, slightly dense | Flaky, soft |
| Sweetness | Mildly sweet or savory | Typically savory |
| Ingredients | Often includes egg, sugar | No egg, minimal sugar |
| Serving Style | With jam, cream, or butter | With gravy or butter |
Both are delicious, but scones lean toward versatility, while biscuits are a Southern staple.
Pros and Cons of Making Scones at Home
Baking scones is rewarding, but it has its challenges. Here’s a balanced look at the pros and cons.
Pros
- Customizable: Add your favorite flavors, from fruit to cheese.
- Quick to Make: Ready in under 40 minutes, perfect for spontaneous baking.
- Budget-Friendly: Uses pantry staples, saving money compared to bakery scones.
Homemade scones let you control quality and flavor, making them a win for any home baker.
Cons
- Technique-Sensitive: Overmixing or warm ingredients can ruin texture.
- Short Shelf Life: Best eaten fresh, as they dry out within a day or two.
- Cleanup: Cutting in butter and shaping dough can be messy.
With practice, the cons become manageable, and the results are well worth the effort.
Tips for Scone Success
Want scones that rival a bakery’s? These tips, honed from years of baking (and a few flops), will elevate your game. My first attempt at scones was a disaster—dense as hockey pucks—but these tricks turned things around.
Keep Everything Cold
Chill your butter, cream, and even the mixing bowl. Cold ingredients create steam in the oven, giving scones their signature flakiness. If your kitchen is warm, pop the dough in the fridge for 10 minutes before baking.
Don’t Overwork the Dough
Mix just until the dough comes together—lumps are okay! Overkneading activates gluten, making scones tough. Think of it like handling a delicate pie crust; less is more.
Use a Light Touch with Mix-Ins
Fold in berries or nuts gently to avoid crushing them. For juicy fruits like raspberries, toss them in flour first to prevent soggy scones. This trick saved my blueberry batch from turning into a purple mess.
Brush with Cream for a Golden Finish
Before baking, brush the tops with heavy cream or an egg wash. This gives scones a glossy, golden crust that looks as good as it tastes. Sprinkle with coarse sugar for extra crunch.
Where to Find Quality Ingredients
Great scones start with great ingredients. Here’s where to source the best:
- Flour and Baking Powder: Grocery stores like Whole Foods or Walmart carry trusted brands like King Arthur.
- Butter: Opt for high-fat, European-style butter from brands like Kerrygold, available at most supermarkets.
- Mix-Ins: Local farmers’ markets offer fresh berries and nuts, or try Nuts.com for dried fruits and chocolate.
Quality ingredients make a noticeable difference, so don’t skimp if you can help it.
People Also Ask (PAA) Section
Here are answers to common Google questions about scones, straight from the SERPs.
What Makes a Scone a Scone?
A scone is defined by its tender, crumbly texture and slightly sweet or neutral flavor, often enriched with butter and cream. Unlike bread, it uses baking powder for lift, and unlike cakes, it’s less sweet. It’s typically served with toppings like jam or clotted cream.
How Do You Keep Scones Moist?
To keep scones moist, use cold, high-fat butter and don’t overbake—18–22 minutes is usually perfect. Store them in an airtight container and eat within 24 hours. Adding a splash of buttermilk can also boost moisture.
Can You Freeze Scone Dough?
Yes, scone dough freezes beautifully! Shape it into wedges, wrap tightly in plastic, and freeze for up to 3 months. Bake straight from frozen, adding a couple of minutes to the baking time.
What’s the Best Way to Serve Scones?
Scones shine with classic toppings like clotted cream and strawberry jam, but butter or lemon curd works too. Serve warm with a hot beverage for the ultimate cozy experience.
FAQ Section
Why Are My Scones Dense?
Dense scones often result from overmixing or using warm ingredients. Mix just until combined, and keep butter and liquids cold to ensure flakiness.
Can I Use Milk Instead of Cream?
Yes, but heavy cream gives scones a richer texture. If using milk, opt for whole milk and expect a slightly less tender result.
How Long Do Scones Last?
Fresh scones are best within 24 hours. Store in an airtight container at room temperature for up to 2 days or freeze for up to 3 months.
What’s the Best Flour for Scones?
All-purpose flour is ideal for most scone recipes, offering a balance of structure and tenderness. Pastry flour works for extra-delicate scones.
Can I Make Scones Without Eggs?
Yes, replace the egg with 1/4 cup of additional cream or a flaxseed egg (1 tbsp flaxseed + 3 tbsp water) for a vegan option.
Troubleshooting Common Scone Problems
Baking mishaps happen to everyone (trust me, I’ve had my share). Here’s how to fix common issues.
Scones Are Too Dry
Dry scones often come from overbaking or too much flour. Measure flour by spooning it into the cup, not scooping, and check for doneness a minute early. Adding a bit more cream can also help.
Scones Don’t Rise
If your scones stay flat, your baking powder might be expired, or you overworked the dough. Test baking powder by mixing 1 tsp with hot water and a pinch of baking soda—it should fizz.
Scones Spread Too Much
Spreading scones mean your butter was too warm or the dough wasn’t chilled. Freeze the shaped dough for 10–15 minutes before baking to keep it in check.
Serving and Pairing Ideas
Scones are versatile, but the right pairings elevate them. My grandma used to serve scones with a pot of Earl Grey, and it’s still my favorite combo. Here are more ideas:
- Classic Tea Time: Pair with clotted cream and homemade jam for a traditional British experience.
- Breakfast Boost: Serve with scrambled eggs and bacon for a hearty morning meal.
- Dessert Twist: Drizzle with glaze or serve with whipped cream and fresh berries.
Experiment with pairings to find your perfect match.
Storing and Reheating Scones
To keep scones fresh, store them in an airtight container at room temperature for up to 2 days. For longer storage, freeze in a zip-top bag. Reheat in a 300°F oven for 5–7 minutes to restore their crisp exterior.
Why This Recipe Works for Everyone
This master scone recipe is a game-changer because it’s adaptable, beginner-friendly, and delivers consistent results. Whether you’re baking for a crowd or indulging solo, the balance of flaky texture and rich flavor makes these scones a hit. Plus, with endless variations, you’ll never get bored.
Final Thoughts
Baking scones is more than a recipe—it’s a chance to create something warm, comforting, and personal. With this guide, you’re equipped to make scones that impress, whether you stick to the classic or venture into new flavors. So grab your apron, channel your inner baker, and let’s make some scone magic. Happy baking!